Most of the Robotic Process Automation (RPA) tools in the market today have either a Community version, a learning version, or a trial version to enable you to try out the RPA platform. Automation Anywhere A2019 community edition is your Automation Anywhere RPA software that you can try out for free.
UiPath has one of the most popular RPA community versions out there as they were the pioneers of the community model. Automation anywhere also followed suite and released the Community version in March 2019.
We will go through the installation and setup of the Automation Anywhere A2019 version. Before that let us see what the Automation Anywhere Community edition is and how it differs from the enterprise version.
What is the Automation Anywhere A2019 Community edition?
With AA 2019 Community Edition, you can explore the benefits of Automation Anywhere Enterprise A2019 platform for free albeit with some limitations which we will explore in the next section. Some of the benefits include:
- A cloud-based tool that you can access from anywhere to build and manage your bots
- A web-based interface to build bots with easy to use drag-and-drop functionality
- You can build at any skill level with no-code, low-code, and bring-your-own-code options
- Intuitive interface that walks you through your initial bots with step-by-step in-product learning
You can download and install Community Edition and learn with the free access to RPA courses on Automation Anywhere University and support from their RPA community, A-People.
So, how does this differ from the Enterprise version?
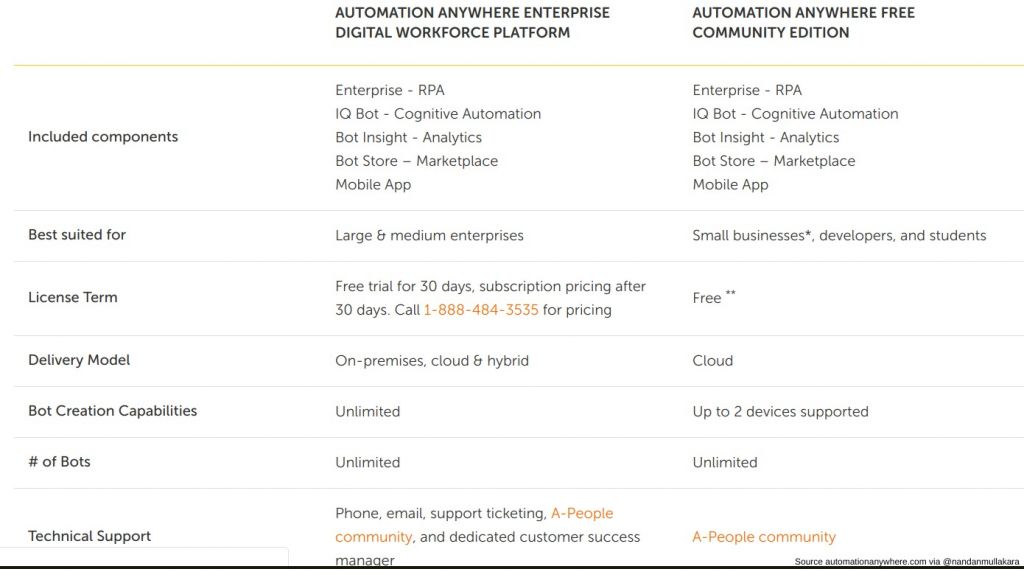
Differences between A2019 Community and Enterprise version
The community edition has all the capabilities of the enterprise software except that Bot creation capabilities are supported only up to 2 devices. It can only be consumed from the cloud and there is no on-premise version right now.
The community edition is targeted for small business, developers, and students to get started with Automation Anywhere RPA.
Another key differentiation from Enterprise edition is that the Tech support is via online forums only. One of the developers also reported that the Citrix feature is missing.
Let us now dive in into the Automation Anywhere Community edition installation. Since A2019 is cloud based, there is not much installation to be done. You start by registering on the Automation Anywhere website.
Automation Anywhere A2019 Community edition registration
To register and activate the A2019 community edition trial account, let us follow these steps:
- Go to the Automation anywhere Community Edition link. (Note: Since websites are changing rapidly, I would recommend that you go and Google for the term automation anywhere Community Edition if the above link does not work.)
- Find the registration form and sign up by providing your details like first & last name, business email, company name etc. and submit.
- Once the details are submitted, you would get and email with the details to access the Control Room. Here is how the email would look like:
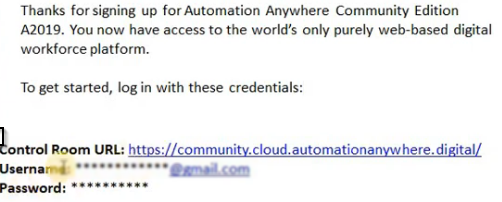
- Now, you can go to your Automation Anywhere control room by clicking on the control room URL.
- Use the credentials provided in the email to login to your control room. Note that you would need to change your password the first time around.
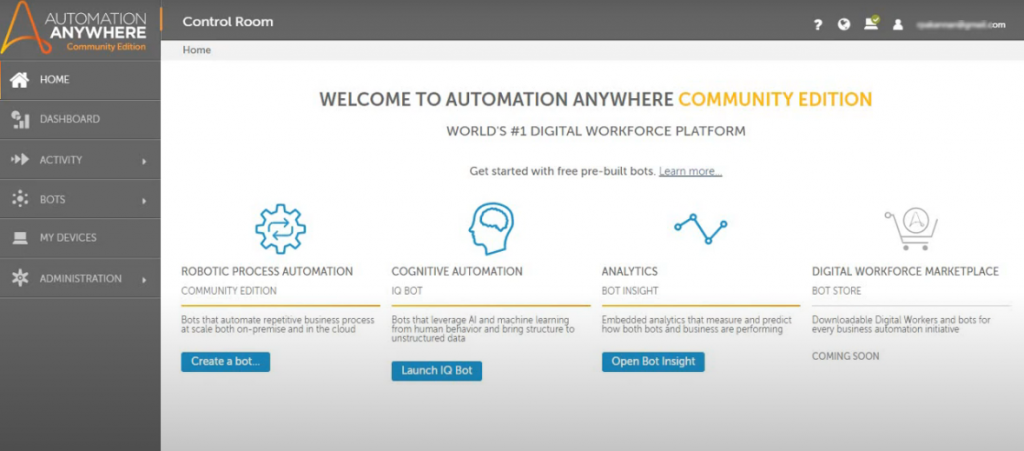
- You should now be on the homepage of the Automation Anywhere Control room. This is the place where you can build and manage A2019 bots.
You are all set with the cloud interface. Automation anywhere needs a lightweight application that runs locally on your machines to carry out the automation. This is called the bot agent and we will install that next.
Install Automation Anywhere A2019 Bot Agent
Here is a quick video from Automation anywhere that walks you through the process of installing the Bot agent.
As you can see from the video, the installation is quick as it is a lightweight application as we said before. Just be careful to also enable the browser extension when it asks you to do so.
The cloud-based control room connects to the agent and the Chrome extensions once everything is setup correctly. You are now ready to build, test and run your automations.
Create your first A2019 bot and test setup
Let us now create a quick bot to test how it works.
On the left-hand side of the Control room, go to Bots -> My Bots and create a new bot as shown below.
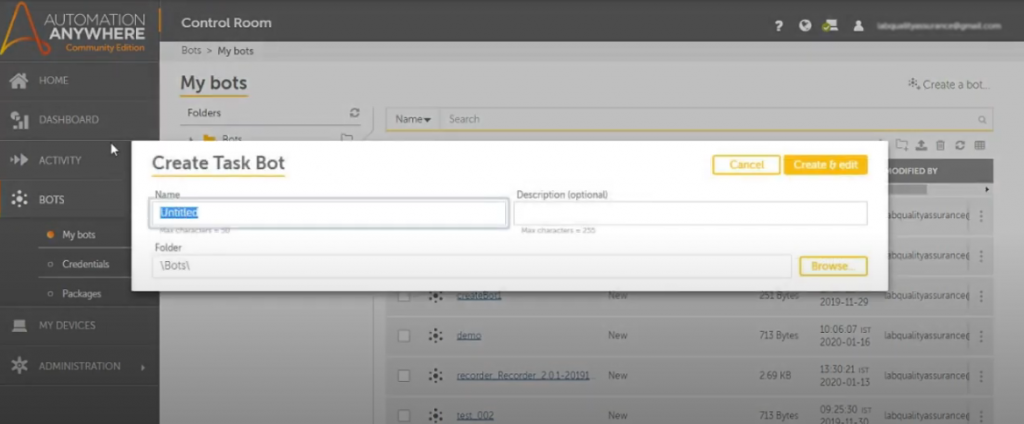
On the next screen, search for Message Box and add this action in between the Start and Stop. Add your message on the right side under Message box properties. Finally, click Apply and then click Save on the top right.
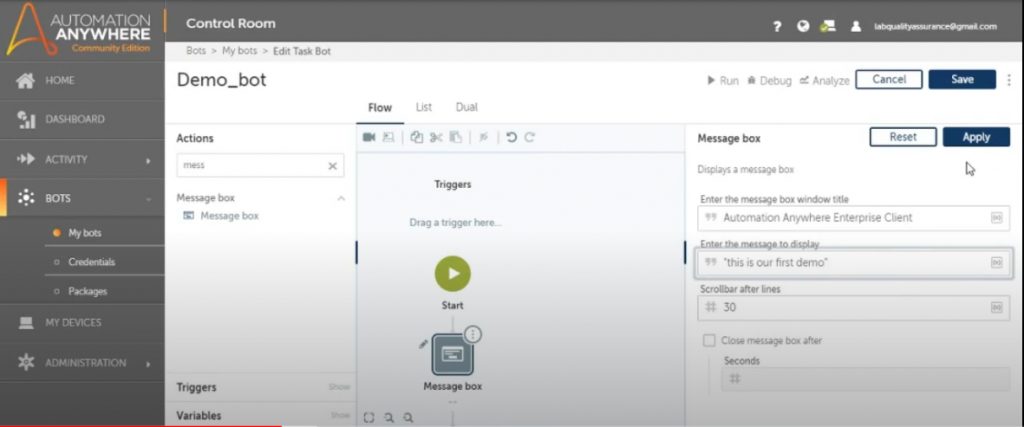
That’s it! Go ahead and click Run on top and you should see your message displayed.
Here is a video that shows these steps on A2019.
Hope you could setup and run your first bot with A2019. If you are facing issues, you can get support from the Automation Anywhere RPA community, A-People.
Have questions or suggestions? Please leave a comment below and we will look to help as much as we can.
Last Updated on 8th February 2021